Please Note: These setting steps work for most of our customers, but sometimes you might need to make some additional changes depending on where you live and which ISP(s) you use.
कृपया ध्यान दें: ये सेटिंग हमारे अधिकांश ग्राहकों के लिए काम कर रहे है, लेकिन कभी कभी आईएसपी नेटवर्क के आधार पर कुछ अतिरिक्त परिवर्तन करने की आवश्यकता हो सकती है|
NOTE: Disable WiFi before you begin this process.
नोट: सेट्टिंग की सुरुवात करने से पहले वाईफाई को बंद (डिसेबल) कर ले|
To Set up Email on Your iPhone, iPad, or iPod Touch
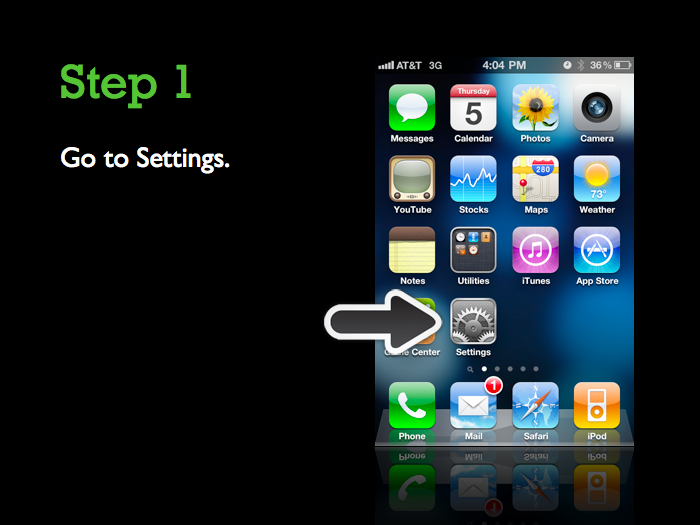
- Go to Settings.
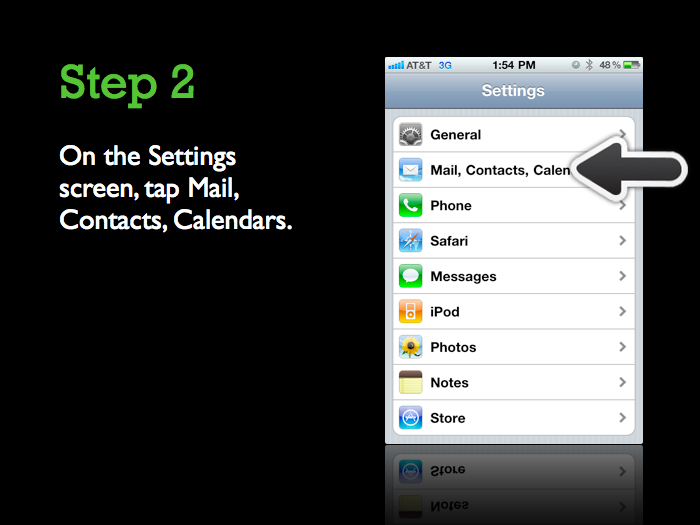
- On the Settings screen, tap Mail, Contacts, Calendars.
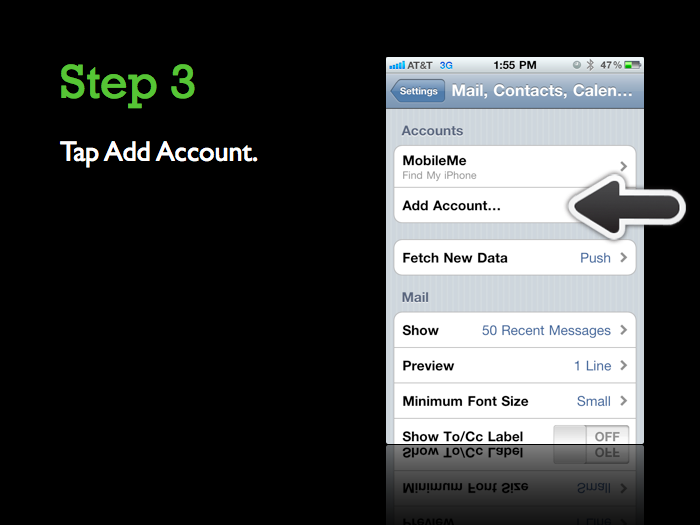
- Tap Add Account.
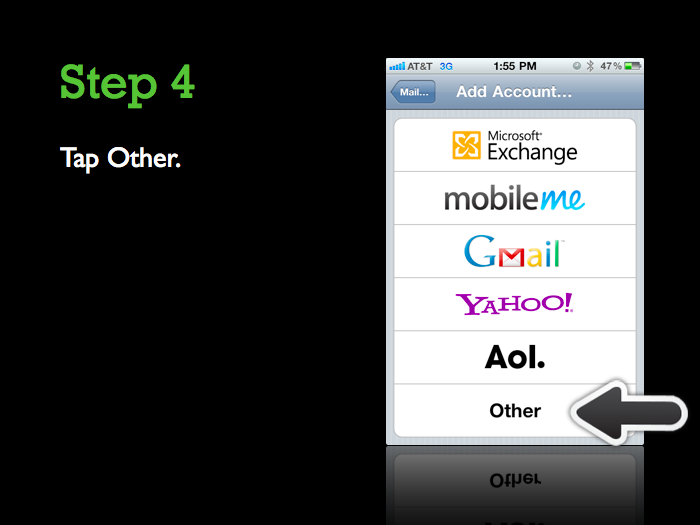
- Tap Other.
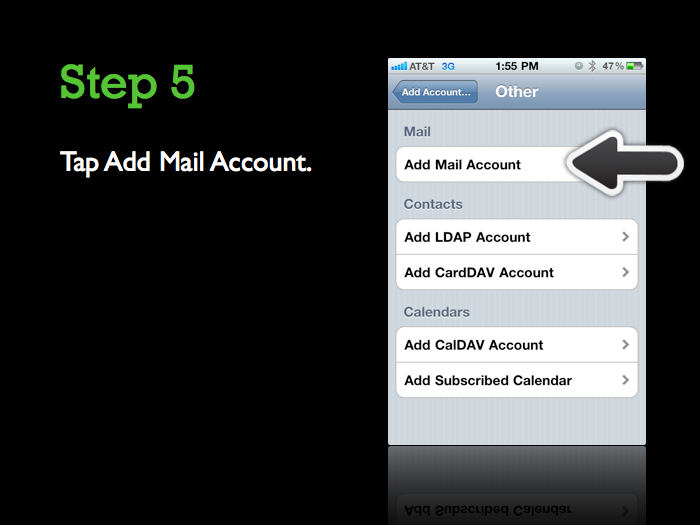
- Tap Add Mail Account.
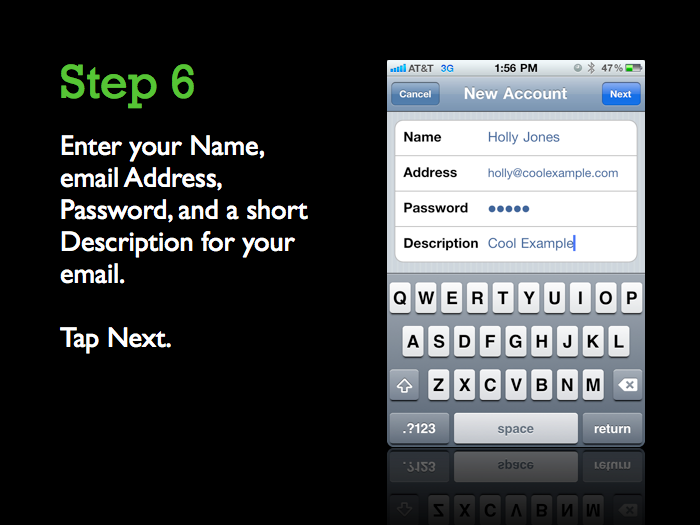
- Enter your Name, email Address, Password, and a short Description for your email. Tap Next.
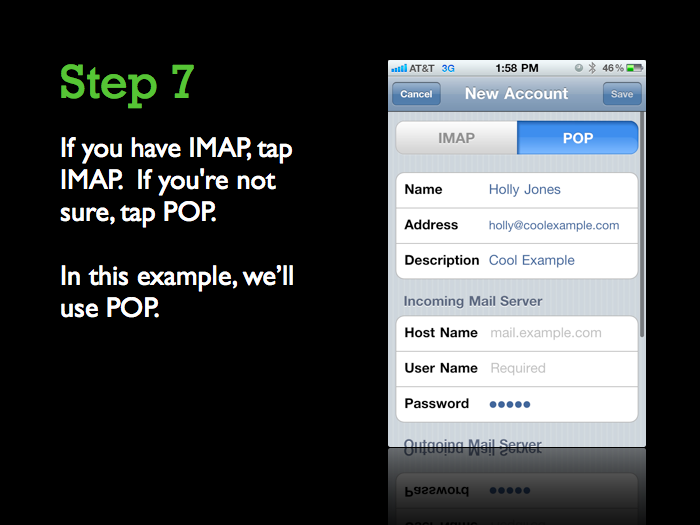
- If you have IMAP, tap IMAP. If you’re not sure, tap POP.
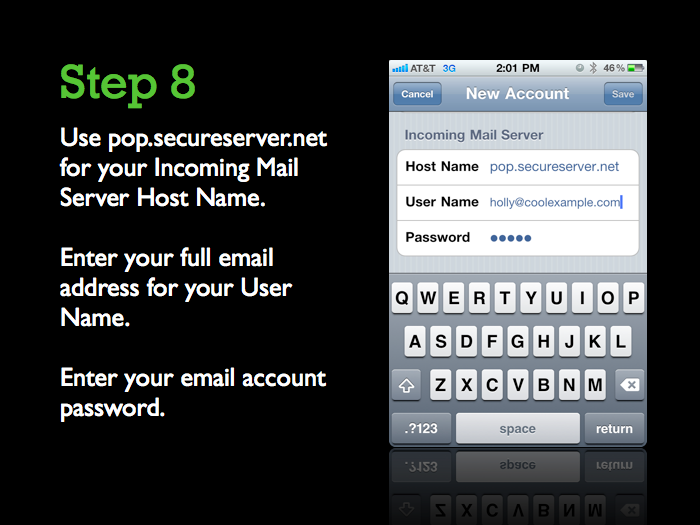
- Use these settings for your Incoming Mail Server, depending on the type of email account you have:
- Use these settings for your Incoming Mail Server, depending on the type of email account you have:
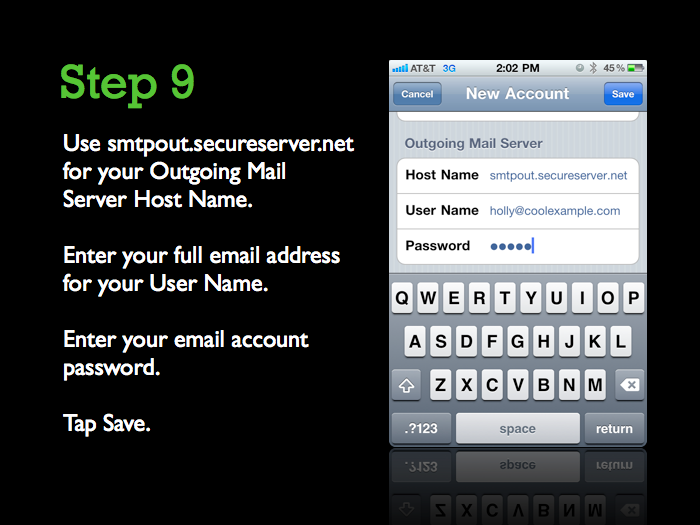
POP Tap POP at the top. Host Name pop.secureserver.net User Name Enter your full email address. Password Enter your email account password. IMAP Tap IMAP at the top. Host Name imap.secureserver.net User Name Enter your full email address. Password Enter your email account password. - Use these settings for your Outgoing Mail Server:
SMTP (Outgoing Mail Server) Host Name smtpout.secureserver.net User Name Enter your full email address. Password Enter your email account password. NOTE: Even though iOS labels these fields as Optional, our email servers require them to send email.
- If you have IMAP, tap Next, and then tap Save. Otherwise, just tap Save.
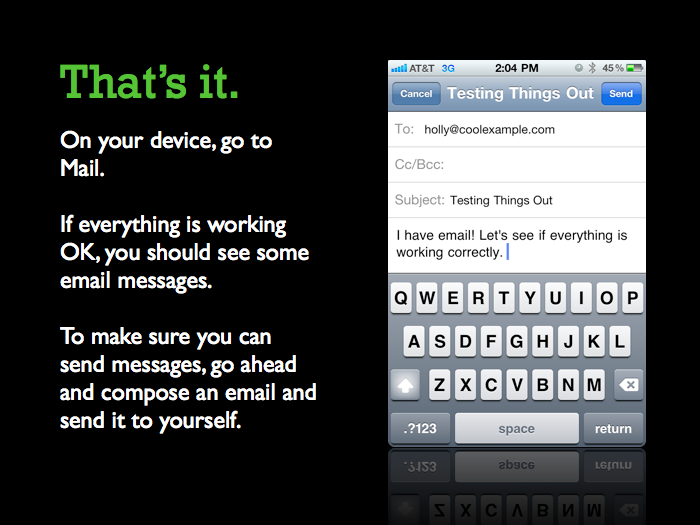
That’s it. On your device, go to Mail (it’s usually in the row at the bottom of your screen). If everything is working OK, you should see some email messages. To make sure you can send messages, go ahead and compose an email and send it to yourself.
Screen-by-Screen